Wednesday, February 27, 2013

The eggshell hoarder

When you get ready to leave the house, do you ever hope that you don't die while you're out running errands?  Not because you love your husband and family or just because you have a wonderful life.  No, it's because you don't want anyone cleaning out your belongings and find the oddball things you haven't taken care of. 
And lo!  My bowl overfloweth!

Here's my reason for hoping that I don't shuffle off to Glory in the very near future.  For the past month or so, I've been hoarding eggshells on a shelf in an out-of-the-way corner of my basement.  (And I do have a reason for this collection.)  I've read recently several recommendations to add crushed eggshells into the hole when planting tomatoes.  The extra dose of calcium can help prevent a tomato condition called blossom end rot.  If it were mid-summer, I could show you numerous pictures of my own tomatoes, but here are some examples of what it looks like.  As its name suggests, the bottom of the tomato is brown, shrunken, and rotted, even when young and green.  Someone recommended a commercial product to me late last summer, but I'm really hoping that this will take care of my garden soil's apparent calcium deficiency this year.  And nothing could be cheaper or more natural!

Well, at least now that there is a post out there in blog land, could someone please explain this to my husband....just in case...

Friday, February 22, 2013

Ham Potato Quiche

The gooshy, spongy, eggy texture of a quiche just doesn't thrill me, but I tried this after my sister promised that it didn't taste like a quiche.  (And a quiche that doesn't taste like one is the best kind....)  I like this dish for any meal of the day.

 100_1682
This recipe is adapted from the More with Less Cookbook (1976).  That's new compared to the rest of my cookbook collection and since I was copywritten in the '70s myself, I'd consider it hot off the presses.  But it's the kind of cookbook I like, basic ingredients and good food.  If you are looking for recipes that don't involve a lot of money, this is the perfect cookbook for you.

Ham Potato Quiche

2 T. fat
3 c. shredded raw potatoes
1 c. grated Swiss or cheddar cheese
3/4 c. ham (or sausage or chicken)
1/4 c. chopped onion
2 eggs
1 c. rich milk (I used a mixture of whole milk and heavy cream)
1/2 t. salt
1/8 t. pepper
1 T. parsley


100_1677
Pre-heat the oven to 425 degrees and melt the fat (I used tallow) in a 9" pie tin.
100_1678
I don't peel my potatoes before shredding them. Mix the potatoes with the melted fat and pat it into the sides.
100_1679
Remove from the oven after 15 minutes and layer on the cheese, meat, and onions.

100_1680
Mix the eggs with the milk, salt, and pepper and pour over the pan.

As an aside....can you guess which egg came from a real farm and which one came from an egg mill? It's a little reminder of why farm eggs are worth their weight in gold. 


 Instead of parsley, I used dried, crumbled kale. (Sometimes you have to be sneaky with the vegetables.) 100_1684

Leftovers are great! The best way to enjoy them is to pop the tin into the oven at 250 degrees or so. Go outside while it's still dark and shovel snow from the latest blizzard until every little body part aches. By the time you drag yourself into the house, it will be hot and just as nice as it was the first time around. And it will hit the spot like no other breakfast you've ever had.

Shared on Simple Lives Thursday.

Saturday, February 16, 2013

Saturday Bath- challenging myself

In every job there must be done
There is an element of fun.
You find the fun and snap!
The job's a game!
So says Mary Poppins, one smart cookie.  My sisters and I invented a game while we were growing up that is still called bet-you-can't-run-out-of-dishes-'til-they're-done.  (Snappy title, eh?  Just rolls off the tongue.)  The basic idea was that the dish washer had to make sure that the dish dryer never ran out of wet dishes in the rack until all the dishes were washed.  It made the mundane daily chore a time of frenzied focus and even strategy. (3 silverware equaled one dish, so 4 spoons put into the drain rack at one time bought you a little time to finish scrubbing that skillet.)

I still follow the philosophy that the more game-like scenarios you can fit into your day, the better. 

Now to get to my point.  I've noticed that while I still love to make soap and that Christmas morning feeling the next morning when I get to cut it, I've clearly been in a rut.  Sometimes I just decide on the colors and wing it, changing my design at frequent whims throughout the batch.  I've relied too heavily on a few favorite techniques, ol' pal ITP swirl and my bestie, faux funnel.  But this is the ideal time of the year for experimenting and I need a challenge.  I have to make a lot of soap for market this spring anyway and in the hub-bub of summer, I'll likely not want to risk any flops.  So this is what I'm doing to mix things up a bit...

I've scoured the internet for soap techniques I've never tried or haven't done in a long while.  I've also jotted down a list of ideas that I've had rolling about my head for a long time.  I wrote each of my 18 ideas on slips of paper and put them all in a jar so whenever I'm in the mood, I can draw out an idea.  And at the end of the week I'll show you what I've done--the awesome, the adequate and the atrocious. 

I just drew my first technique--a hanger swirl.  I'm super excited--I'm always more creative with a little kick to the backside!

Thursday, February 14, 2013

Making a Pie, part 2

Thanks for stopping by!  For the most recent content, you can find me at A Housewife Writes.

Now that I've told you how I was able to overcome extraordinary odds and make an actual pie crust (and in less than three hours, no less!) I thought I'd share the recipe that I use.  My mother uses a recipe called No Fail Pie Crust (an absurd name for a recipe that failed so unfailingly for me). Hers calls for egg and vinegar, but I like the fact that this one is so simple.  Both the pie crust and pie recipe are from the Searchlight cookbook, first published in 1931 and still easy to find at a reasonable price (See Amazon link on the sidebar.)

Plain Pastry
1 1/2 c. flour (I use whole wheat--Prairie Gold--with beautiful results)
1/2 c. lard or butter
1/4 c. cold water
1/2 t. salt

Sift flour, measure, and sift with salt.  Cut in lard or butter until mixture is coarse and granular.  Work water in lightly with a spatula until little balls of dough just hang together in one large ball.  [Then chill the dough, of course.] This makes one two-crust pie.


100_0589


With my new-found pie-making knowledge, I've been having fun trying new recipes.  Old cookbooks are just packed with pie recipes!  I'll be working my way through them for the rest of my life.

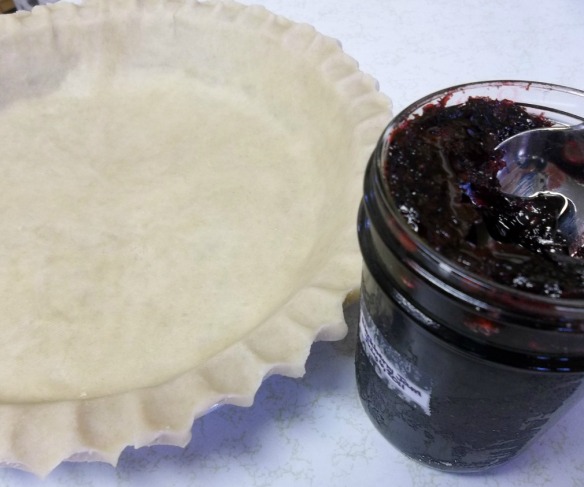
It just so happened that I had some homemade slightly overdone (extra thick) blackberry jam in my pantry but it would be great with other kinds of jams, too.  It's the sour cream that makes this pie so rich and creamy.


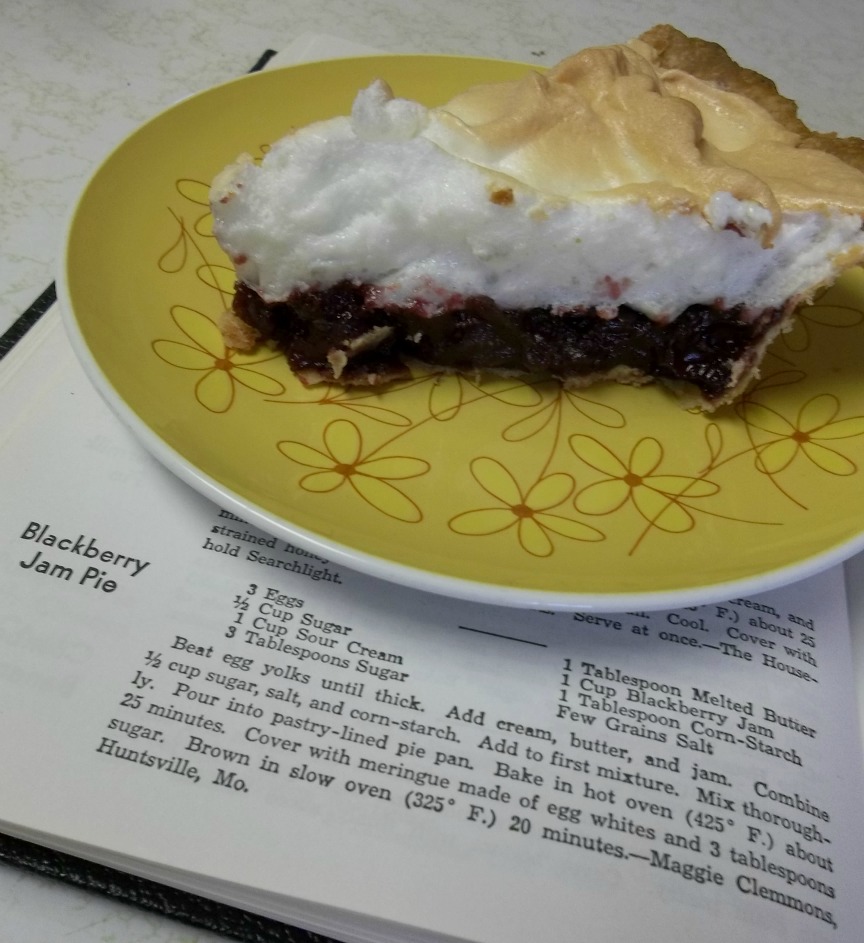
Blackberry Jam Pie

3 eggs
1 c. sour cream
1 T. melted butter
1 c. blackberry jam
1/2 c. sugar
1 T. cornstarch
3 T. sugar (I used white sugar to keep the meringue pretty)
few grains salt
Beat egg yolks until thick.  Add cream, butter, and jam.  Combine 1/2 c. sugar, salt and cornstarch.  Add to first mixture.  Mix thoroughly.  Pour into pastry-lined pie pan.  Bake in hot oven (425 degrees) about 25 minutes.  Cover with meringue made of egg whites and 3 T. sugar.  Brown in slow oven (325 degrees) 20 minutes.

100_0590
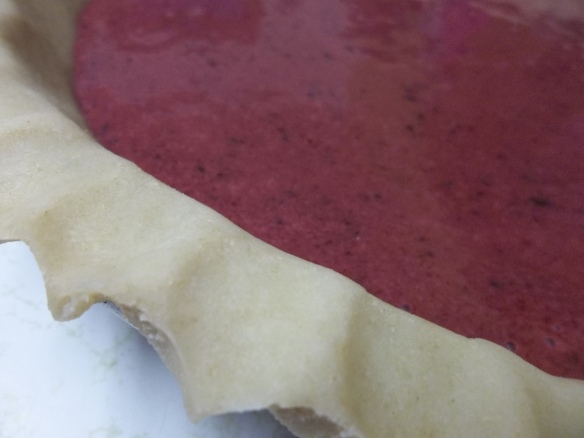
Gorgeous color, huh?


100_0594
This post has been linked to Old Fashioned Friday.

Monday, February 11, 2013

Making a Pie, part 1

Pie-making is not one of my natural talents.  For many years, a wedding cake with three tiers and fountains was less daunting than a pie.

My first foray into pie making occurred when I was about 14 and wanted to try something new.  It was so easy I couldn't understand why people spent years mastering them.  It was only after trying to eat my rhubarb-filled wonder that I discovered that the recipe had I doubled for the two pies was already for two pies.  Talk about your sturdy crust.

Later I found pie making truly a tricky matter.  It was further disheartening to watch my grandma casually toss some flour and lard in a bowl and effortlessly make perfect pies.  And she did it without whining about the sticky dough that wouldn't roll without tearing, threatening the household that it better appreciate this pie or blaming the humidity for another crust disaster.

I eventually married someone who loves pie--in other words, a typical man.  (Why do they all like pie so much?)  I earned double good-wife points a few times a year when I set aside all my work and projects for a day to make something resembling a pie.

My standard procedure included using lots and lots of flour to keep the dough from sticking to the parchment paper where I rolled the dough.  (The tough crust that resulted was the least of my problems.)  I would then freeze the rolled-out dough so that I could easily peel it off the paper and lay it frozen across the top of the pie pan.  After it thawed, I would pat it down into the pan.  All that freezing and thawing took so long that I scoured my cookbooks for one-crust pies.  Captain Awesome eventually noticed that he rarely got an apple, peach, or rhubarb or other two-crust pie.

100_0579

One day I shared my woes with my mother-in-law (a pie whiz) and she suggested that I chill my dough overnight.  About the same time, I found a piece of canvas meant for rolling pie dough, along with a "sock" to put over the rolling pin.  Chilling the dough has made all the difference in the world and if you can locate the baker's canvas, I highly recommend it.  It makes it easy to manuever the dough into the pan and is washable (reusable!).

100_0580
See?!  A pie crust that's not a leaky, patchwork, pressed-into-the-pan, sad excuse of a crust.

Next post, my crust recipe and a finished pie....

Thursday, February 7, 2013

Deviled Meat Muffins

 My recipe today comes from Meat Stretchers, a 48 page booklet written in 1943 by Gladys Blair.  It was, of course, written during World War II and addressed the war effort.  The beginning of the book reads
The American homemaker has a grave responsibility in our all-out war effort!  There is no more important task than that of providing the families of this country with appetizing and nourishing meals that make for strength, health and morale.

The war is making tremendous demand upon our food supplies, for food is a weapon in this war.  Of special importance is the unprecedented demand for meat.  Secretary of Agriculture Wickard has made the statement, "In this war meat is the great food weapon."
The preface goes on to say that a fighting soldier needed twice as much meat on the battlefield as he did at home and that it was necessary to make better use of the meat available to those on the homefront by using every little bit wisely, making use of the variety meats (organ meats) and utilizing strategies to "extend" the meat.

I recently made Deviled Meat Muffins with Cream Gravy and it was so well-received that it will become a regular dinner menu around here.  It is essentially a meatloaf, with an interesting twist in the cream gravy,  the meat stretching component to this recipe.  I like the cup shapes, too--they cook so much faster than a regular meatloaf.

Deviled Meat Muffins

1 pound ground beef
1 c. soft bread crumbs
3 T. prepared mustard
2 T. prepared horseradish (the shredded kind, not the processed, mayonnaise-like variety)
2 t. chopped onion
1 t. Worcestershire sauce
1 1/2- 2 t. salt
1/8 t. pepper
3/4 c. milk

As with all meatloaf recipes, combine all ingredients together.

Spoon into muffin cups and bake at 350 degrees for 35-40 minutes.  (It filled 9 muffin cups for me.)  Remove from pans and reserve the liquid for the cream gravy.

Cream Gravy
4 T. flour
1 1/2 c. milk
salt and pepper
reserved meat juice

Mix the flour and a little of the milk to a smooth paste.  Add the remaining milk gradually and cook over low heat, stirring constantly until thickened  Stir in the liquid from the meat and season with salt and pepper.  (I had very little meat juice left in the muffin tin, so I added a glug or two of chicken broth that I had in the fridge.)

I really liked the horseradish in these mini meatloaves and the creamy gravy, albeit simple, was a lovely touch, making it more elegant than plain ol' meatloaf. 

This post has been shared on Simple Lives Thursday.

Tuesday, February 5, 2013

Me and My Cookbooks

Some of my collection
On my 9th birthday, I received my first "very own" cookbook and there began my love of cooking. Snickerdoodles, pumpkin custard, and hot milk sponge cakes were a few of my early specialties. (I always have liked the desserts!) Over the years, I've added--extensively (ahem)--to my cookbook collection, with a special interest in old ones--those dating from the 1960s and earlier.

Some of the reason for my interest in old cookbooks is a fascination with history. Not so much the wars and explorations, but the everyday stuff, about everyday people--how they worked, played, and just lived. And in their own way, cookbooks are a kind of history book, chronicling economics and lifestyles through food. In addition to that, the older cookbooks embrace real food, like butter, lard, eggs, and cream instead of modern "quick and easy" recipes that rely on heavily processed ingredients and factory produced mixes.

Some time ago, I decided that instead of just reading cookbooks for fun, I would use them and actually cook the recipes in them. (I know!! What will I think of next?!) I was born in the 1970s--way after the good old days, in my opinion. But what better way to experience an earlier time than by eating its cuisine, its "daily bread?" Shopping for the same ingredients and making the same recipes that my Grandma did will let me experience a bit of her world in these days very far removed from that time.